Enjoy!

Fold a crisp new dollar (or a piece of paper that measures 6 1/8 x 2 5/8) in half lengthwise. Turn and fold in half the other way as shown. These are mountain folds.

Fold down each top corner from the centerfold until the corner touches the bottom of the dollar. Do not crease the corners flat. Stop when you meet the center crease.

Fold back the long center mountain fold. Allow the points of the bill to stand and curve as shown.

Flatten the previous curved paper by folding in the bottom of each side until it meets the long mountain fold. This fold should result in the top points being divided in half.

Fold back the bottom points until they open out as shown.

Valley fold each side of the dollar along the middle fold. This picture shows the left side folded down.

This is how the dollar looks after you fold down both sides along the center. Turn over the model and fold back each side to the center fold.

The butterfly looks like this after the last fold. Turn the model over again.

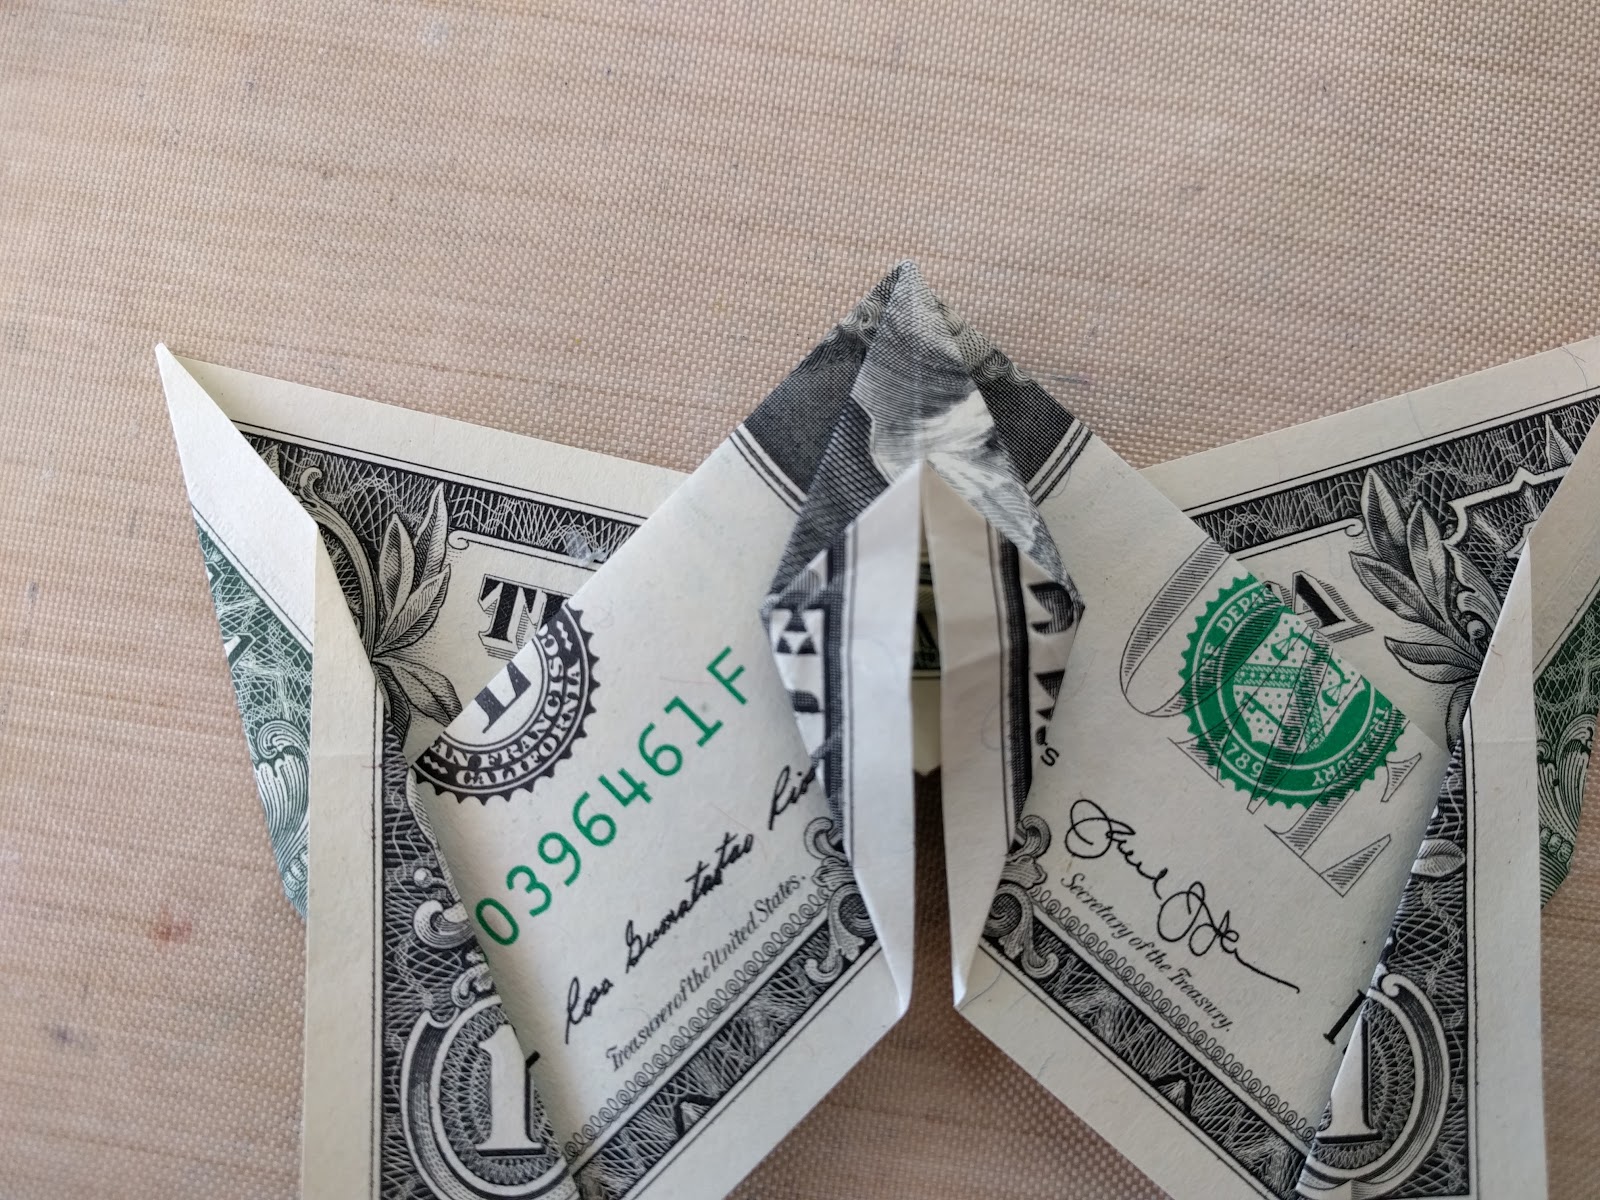
There is a center kite shaped that needs to be folded to make the flapping mechanism.

Fold up the bottom of each side of the center kite. Invert these folds as in the bird base (see the picture below).
The point you just created can be grasped and pinched and the wings will flap.

Enjoy John's flapping butterfly!
No comments:
Post a Comment